Overview of the Membership Site Example
In this tutorial, we’ll explore an existing membership site created with Divi and the Divi Membership plugin. The site we’ll be using as an example is built for a wine subscription service. This site showcases various features and functionalities that can be adapted for any type of membership site. Whether you’re planning to offer online courses, exclusive content, or a subscription service, the principles demonstrated here will help you create a robust membership platform.
Setting Up Membership Plans
On our example site, different membership plans are defined to cater to various user needs:
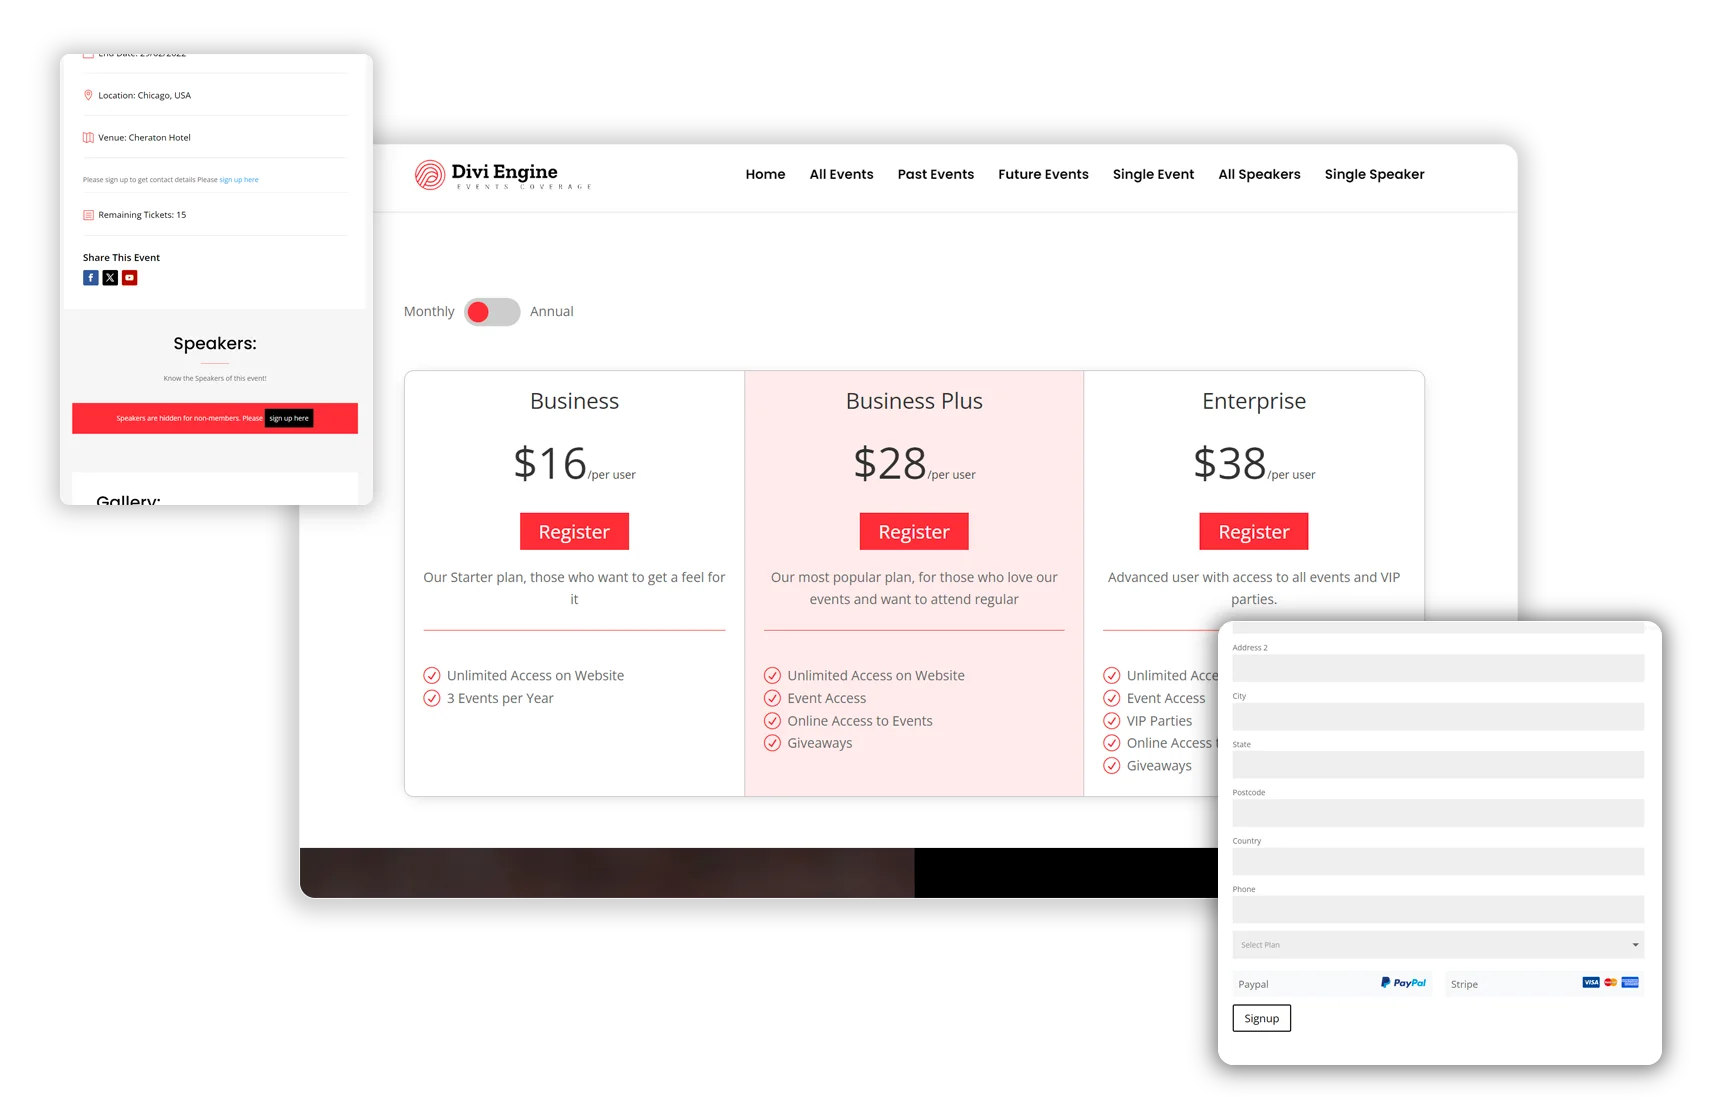
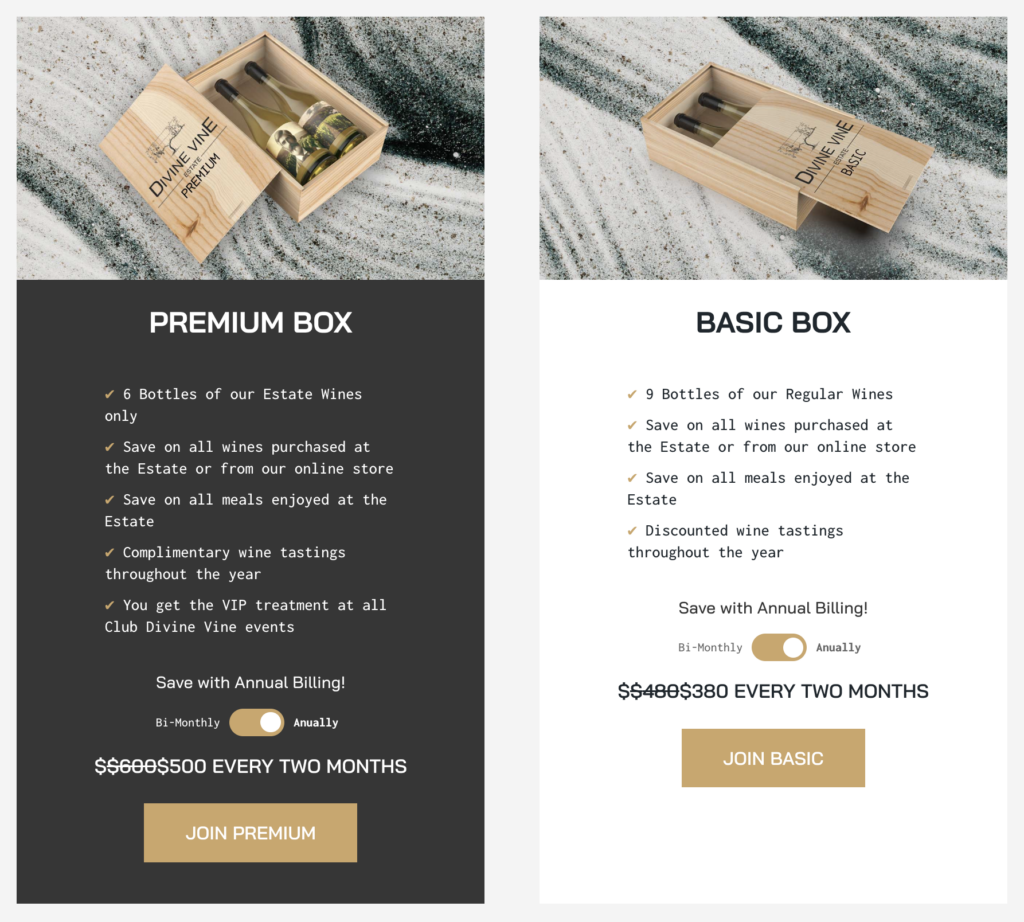
- Membership Plans: The site offers Free, Basic, and Premium plans, providing users with different levels of access and benefits. The Free plan might offer limited access to introductory content, while the Basic and Premium plans unlock more extensive resources and exclusive features.
- Billing Cycles and Pricing: Users can choose from billing cycles like bimonthly, annual, or one-time payments, with pricing tailored to each plan. For instance, the Basic plan might be available for $20 per month or $200 per year, while the Premium plan offers additional perks at $50 per month or $500 per year.
- Customizing Plans: Each plan includes a detailed description and a list of features, helping users understand the value of each tier. Descriptions may include benefits such as exclusive access to certain content, discounts on products or services, or special support options.
Setting up these plans within the Divi Membership plugin is straightforward. You’ll navigate to the membership settings, where you can define each plan, its pricing, and its billing cycle. Detailed descriptions help potential members see the value in upgrading to a higher tier.
Configuring Payment Gateways
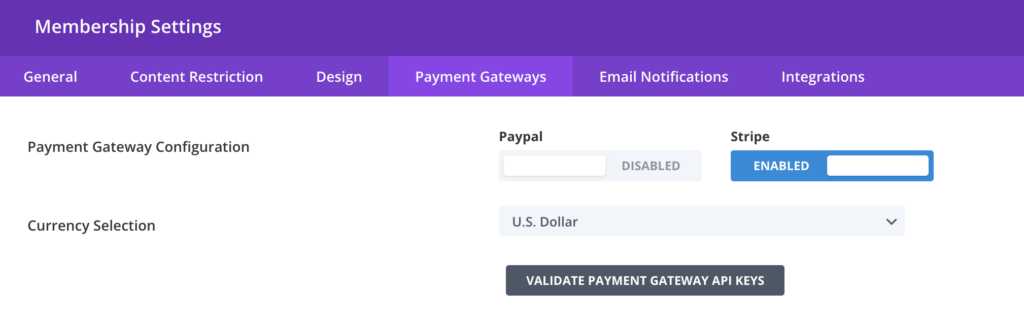
Setting up payment gateways is crucial for processing memberships:
- Payment Gateway Setup: The site integrates with Stripe and PayPal for seamless transactions. These popular payment processors ensure that users can easily and securely subscribe to your service.
- API Key Validation: API keys for Stripe and PayPal are enabled and validated to ensure secure payment processing. Validating API keys involves entering the provided keys into the Divi Membership plugin settings, which then verifies their authenticity.
- Custom Messages: Payment error messages and feedback are customized to enhance user experience. Personalized error messages guide users through resolving issues, such as incorrect payment information or declined transactions.
In the Divi Membership plugin, setting up payment gateways involves navigating to the payment settings and entering the necessary API keys. Customizing payment messages ensures that users have a smooth experience, even if they encounter issues during the payment process.
User Registration and Login
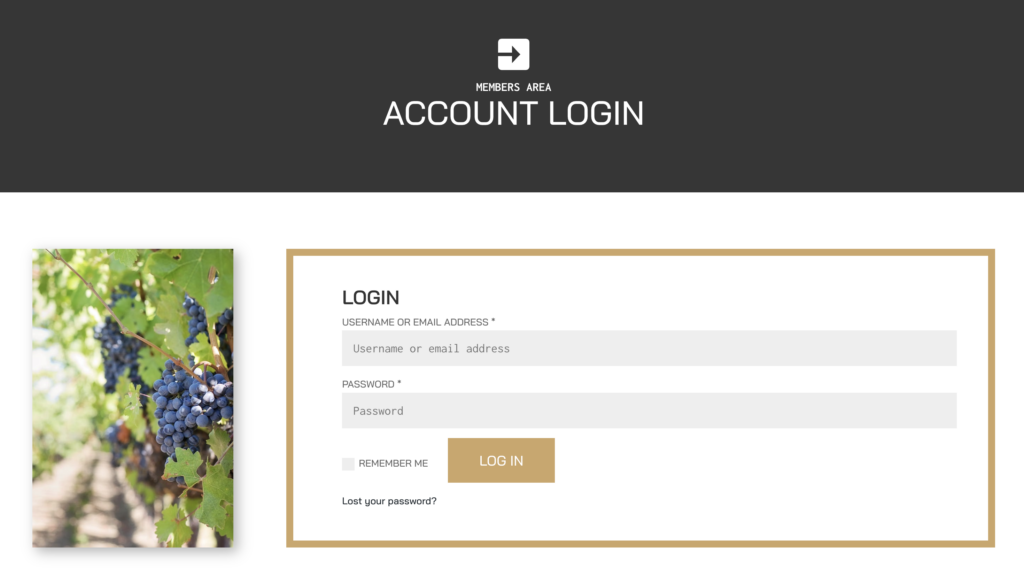
User-friendly registration and login processes are essential for membership sites:
- Login Page: A custom login page is created using the Divi Membership login module, providing a seamless entry point for users. This page can be styled to match your site’s branding, ensuring a cohesive look and feel.
- Registration Form: The registration form is tailored to include necessary user roles and redirect settings, ensuring users have a smooth sign-up experience. Redirect settings might direct new members to a welcome page or a dashboard after they register.
- Custom Design: Both login and registration pages are designed to match the overall site style, maintaining a cohesive look and feel. Using the Divi Builder, you can design these pages to include your brand’s colors, fonts, and other design elements.
Creating custom registration and login pages involves using the Divi Builder to add the necessary modules and customize their appearance. The login module allows users to access their accounts easily, while the registration module ensures new members can sign up without hassle.
Restricting Content Based on Membership Tiers
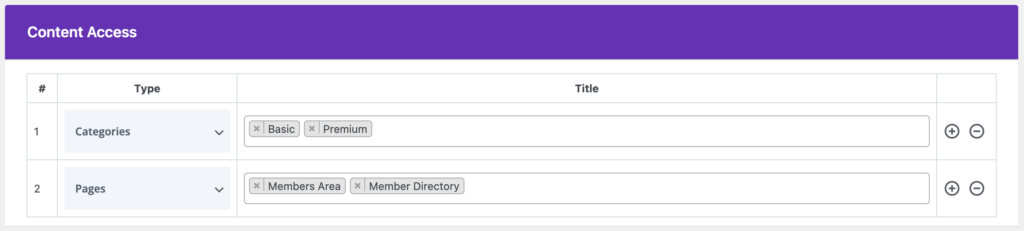
Content restriction is key to providing exclusive access based on membership levels:
- Content Access Rules: Access rules are defined to restrict content based on membership tiers, ensuring users only see content relevant to their plan. For example, Premium members might have access to exclusive articles, videos, or downloadable resources.
- Categories and Pages: Content is restricted using categories, pages, and custom post types, allowing for flexible access control. You can assign content to specific categories that correspond to membership tiers, ensuring only the appropriate members can view it.
- Custom Messages: Messages for non-members or lower-tier members are customized to encourage upgrades and inform users about available content. These messages can include calls to action that prompt users to upgrade their membership to access more content.
Setting up content restrictions involves defining access rules in the Divi Membership plugin. You can control access based on membership tiers, ensuring that users only see content they are entitled to. Custom messages help guide users towards upgrading their membership.
Practical Application and Examples
Let’s see these features in action on our example site:
- Membership Plan Selection: Users can easily select and compare different membership plans, understanding the benefits and costs associated with each. A comparison table might show the features available at each membership level, making it easy for users to decide which plan suits their needs.
- Billing and Payment: The site’s billing options and payment gateways are showcased, demonstrating how transactions are processed. Users can select their preferred billing cycle and complete their payment using Stripe or PayPal.
- Content Restriction: Examples of restricted content illustrate how access is managed based on user membership levels, ensuring a tailored user experience. Users who attempt to access restricted content are prompted to upgrade their membership, ensuring that the most valuable content remains exclusive.
By following these steps, you can create a membership site that provides valuable content to your users while ensuring a smooth and secure experience. The Divi Membership plugin offers the tools you need to manage memberships, process payments, and restrict content based on membership levels.
Conclusion
This walkthrough provides a practical look at building a membership site with Divi and the Divi Membership plugin. For detailed steps on planning and setting up your own site, refer to our comprehensive guide here.
We hope you found this tutorial helpful. If you have any questions or need further assistance, feel free to leave a comment below. Ready to get started? Grab the Divi Membership plugin and start building today!