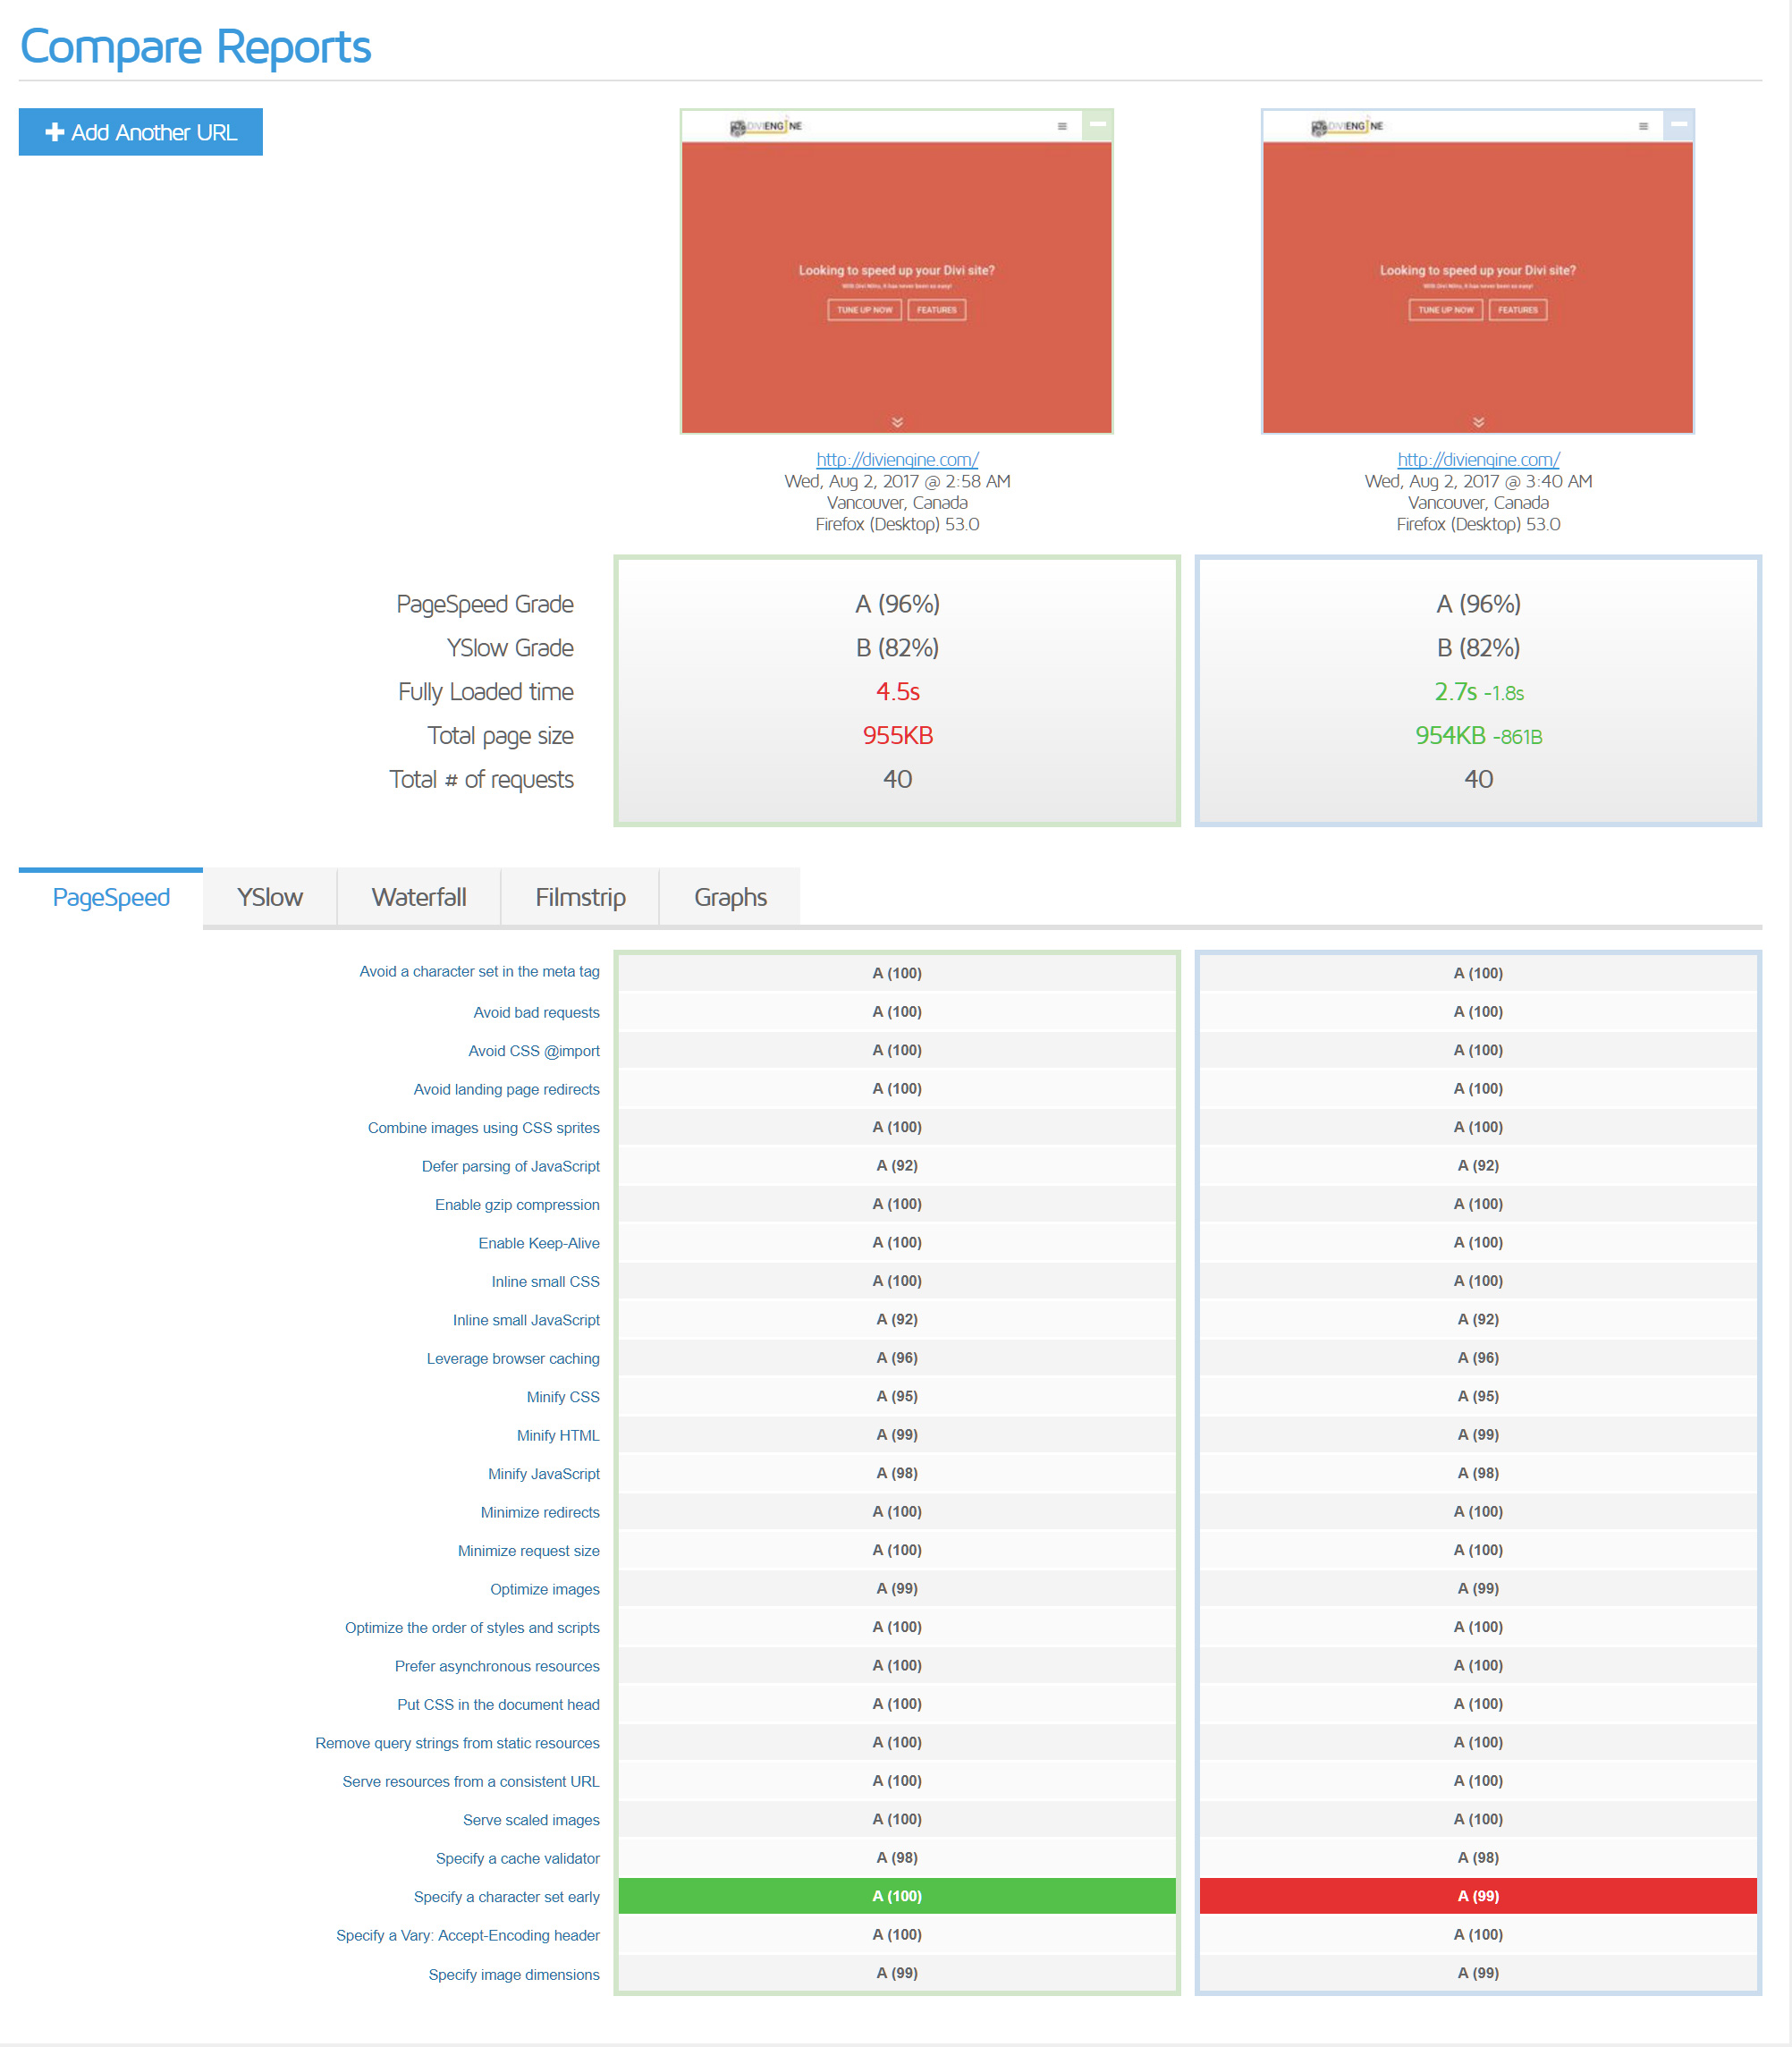
The Results
As you can see above it didnt nessesarily change the gtmetrix score but did reduce the site load time from 4.5s down to 2.7s ! A MASSIVE improvement. So this sounds great, but isn’t it hard to move servers with issues along the way? Not really with Cloudways. See how to below!
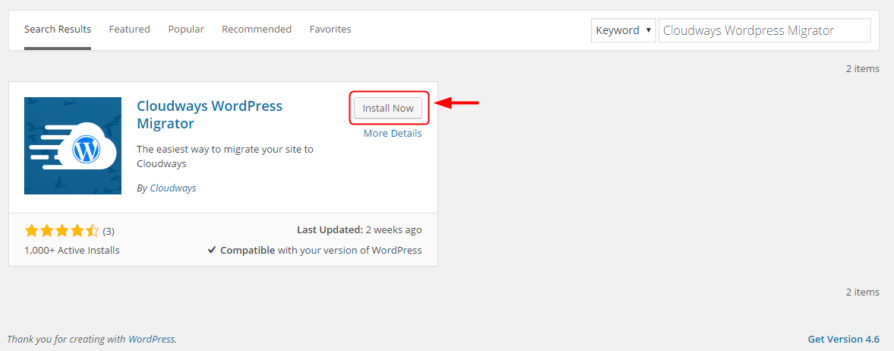
Step 1 – Install Cloudways Migrator
So the first thing to do is to install the Cloudways Migrator – this does all the work for you. Go to your plugins > add new and search for “Cloudways WordPress Migrator”. Install and activate.
Step 2 – Filling in the fields
You will now be presented with various fields to fill out.
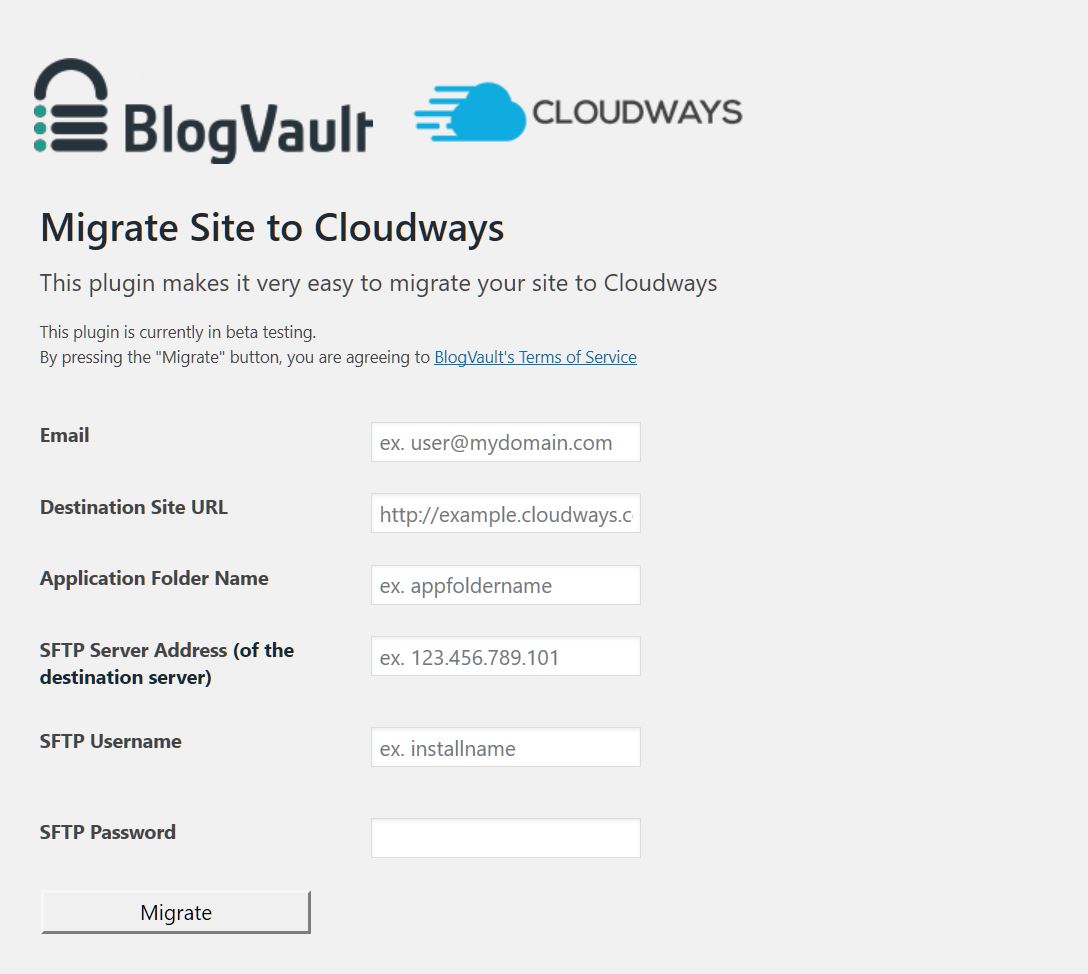
This would be your email address.
Destination Site URL:
This would be your application url. When you first create an application it will generate a url that starts ends with cloudwaysapps.com. This would be it. Example: wordpress-215435-5214783.cloudwaysapps.com. Once the site has been moved you can then change the primary domain. You can find this under the Domain Management tab under your application settings
Application Folder Name:
This is application name – you can find this as it is your db Name and username. So go to Access Details tab under your application settings and look under MYSQL ACESSS – there you will see a wierd name – something like hdnalugdjn – that would be the folder name.
SFTP Server Address:
Go to your server settings page. Under master credentials you will see your Public IP. This is your server address
SFTP Username:
As per the server address, but your Username would be what you need to enter here.
SFTP Password:
As per the server address, but your Password would be what you need to enter here.
So filled out it would look like:
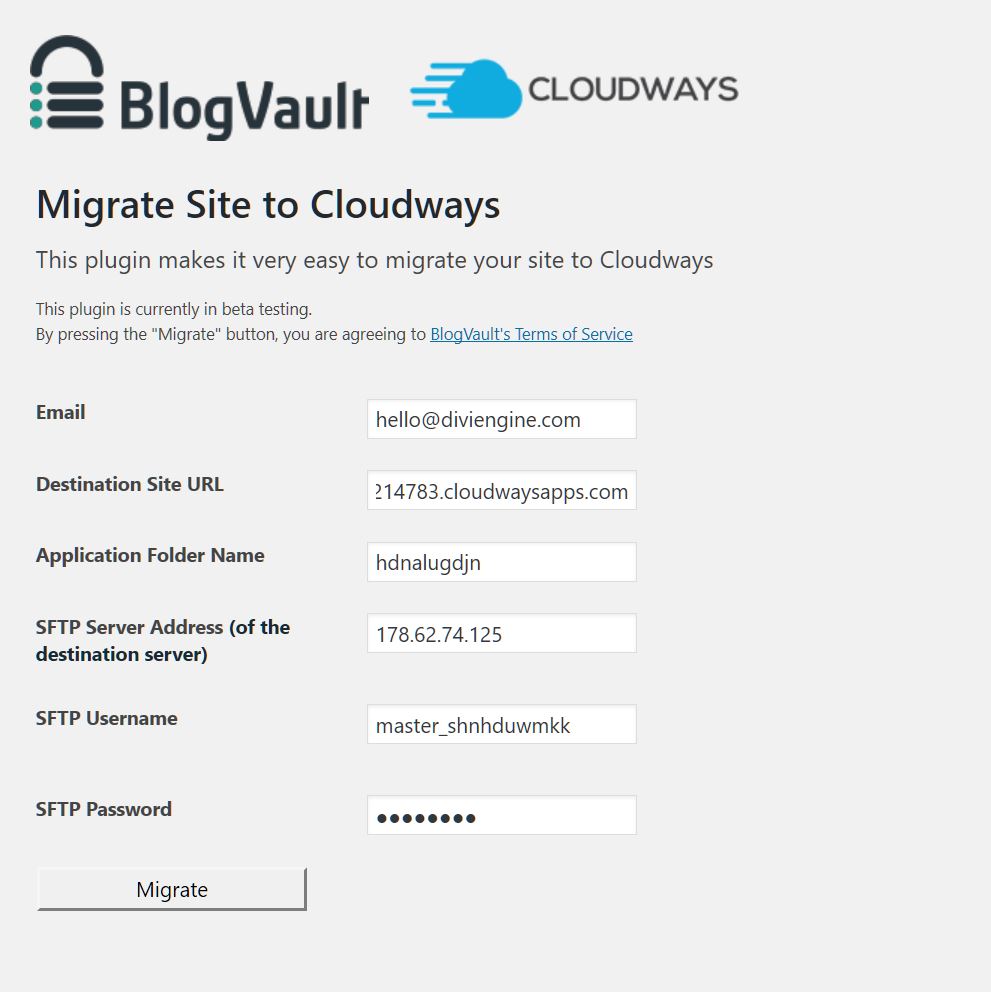
Step 3 – Migrate and let them do all the work
Press migrate and you will see the progress of it all being moved. Go for a cup of coffee, stretch your legs, do whatever and when you come back it will be moved. It will show that is is complete.
Step 4 – Change Primary domain
So the next thing to do is to change the primary domain name from the long name ending in cloudwaysapps.com to your domain name that you want. So using the example above I would change wordpress-215435-5214783.cloudwaysapps.com to be diviengine.com.
NOTE: This will update the database too so no need to be changing it there, it will change all the url in the database to be your new primary domain.
Step 5 – Configure
After this we like to do a few things:
1 – Install an SSL Certificate – https://support.cloudways.com/how-can-i-get-an-ssl-certificate-for-my-application/
2 – Rename application folder name for better UX in ftp – https://support.cloudways.com/how-to-rename-your-web-application-folder/
3 – Remove default themes and plugins that get added when setting up a Cloudways WordPress application.
Tell us what you think as it saved us around 1.5 seconds in load time.


0 Comments