Pixel perfect images in Divi at any scale
You’ve done it. I’ve done it.
You are working on a project and you are using your googler skills to track down some images for said project. Like parting clouds to break the storm, you find the perfect image but there is a problem (cue dun dun dunnnnnn).
The image you found is a measly 250px by 100px png and you already know that CSI has been lying to you your whole life and that yelling enhance at your monitor will do diddly squat.
Never fear, a scary image format called SVG is here to ease your pixelated concerns.
Let’s learn how to use SVG images in Divi using 2 methods that will impress mum.
As with most things in life, they are easier to understand if we know what the heck they are, so let’s get dem toes wet and start by defining what an SVG is.
An SVG (or Scalable Vector Graphic) is a scalable, vector-based image format that can be used on web pages. It is designed to be an open standard for graphics on the Web and is compatible with most browsers. To create these fancy SVG images you would typically use some image editing software like Adobe Illustrator ($$$) or Inkscape (free).
So now that we know what these foreign objects are we can talk about why we are here. WordPress and Divi do not support SVG files by default, so we need to use some tools to enable SVG uploads to our Divi install which we will look at in this Divi tutorial.
We will even take things a step further by also looking at how one can use SVG code, yes, you read that right, to add SVG images to our Divi install and manipulate them with some CSS code.
I know, mind blown 🤯
Let’s do this!
Video Tutorial
Table of Contents
Difficulty
Intermediate
Time
20 Minutes
Why use SVG images in Divi?
There are two main reasons why using SVG images in Divi is better than PNG or JPG files.
Scaling
PNGs (Portable Network Graphics) are raster-based files. They feature high resolutions, lossless compression, transparency, and the ability to handle 16 million colors. This makes them an excellent choice for graphics, logos, charts, and illustrations — as well as very detailed photographs.
SVGs (Scalable Vector Graphics) work well for logos and graphics because you can scale them up or down for different purposes. They’re also a popular choice in web design because search engines like Google can read their XML programming language. This helps with SEO and website rankings.
Unlike PNGs, SVGs are vector-based. This means that they use mathematical algorithms to display images, which you can then scale to any size without negatively impacting their quality.
File Size
PNG file sizes are often large so that they can handle high resolutions. Their size means they can take longer to process, share, save, and open. It can also slow down page loading times — which is why JPEGs are more common for online photography.
SVGs are far smaller in size than PNGs and aren’t likely to slow down your computer or website. (However, very detailed designs may slow down an SVG.) Because they’re a vector file format, you can scale SVGs up or down without any loss in quality.
Don’t use fatty files sizes, they are bad for the internet.


Images remain nice and crisp at any size and usually load much faster than other image formats.
Creating an SVG logo in Illustrator
Illustrator is an awesome tool to use for creating vector images like SVGs, but I get it, it can be expensive for some so we recommend InkScape as a free alternative to those of you just starting out or playing around. You should be able to follow along without much trouble in either software.
Instead of teaching you how to create an amazingly designed logo, we are showing you the tools you’d use to create a logo that best reflects your brand. That is code for I’m a terrible designer.
Be that as its way, we will be recreating this logo in its pixel-perfect glory:
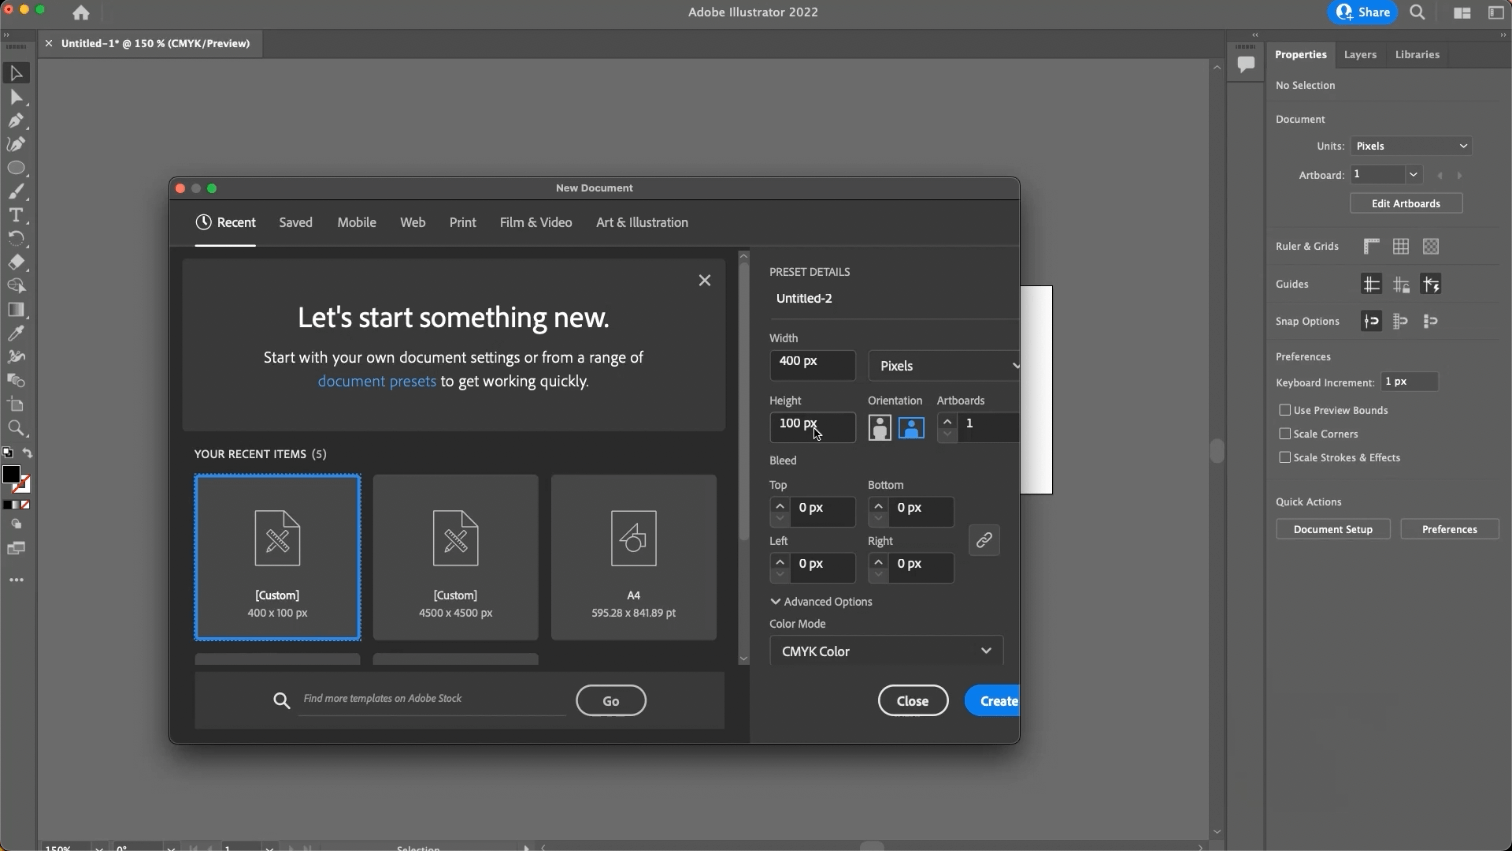
Fire up Adobe Illustrator
New Document
Width: 400px
Height: 100px
Create
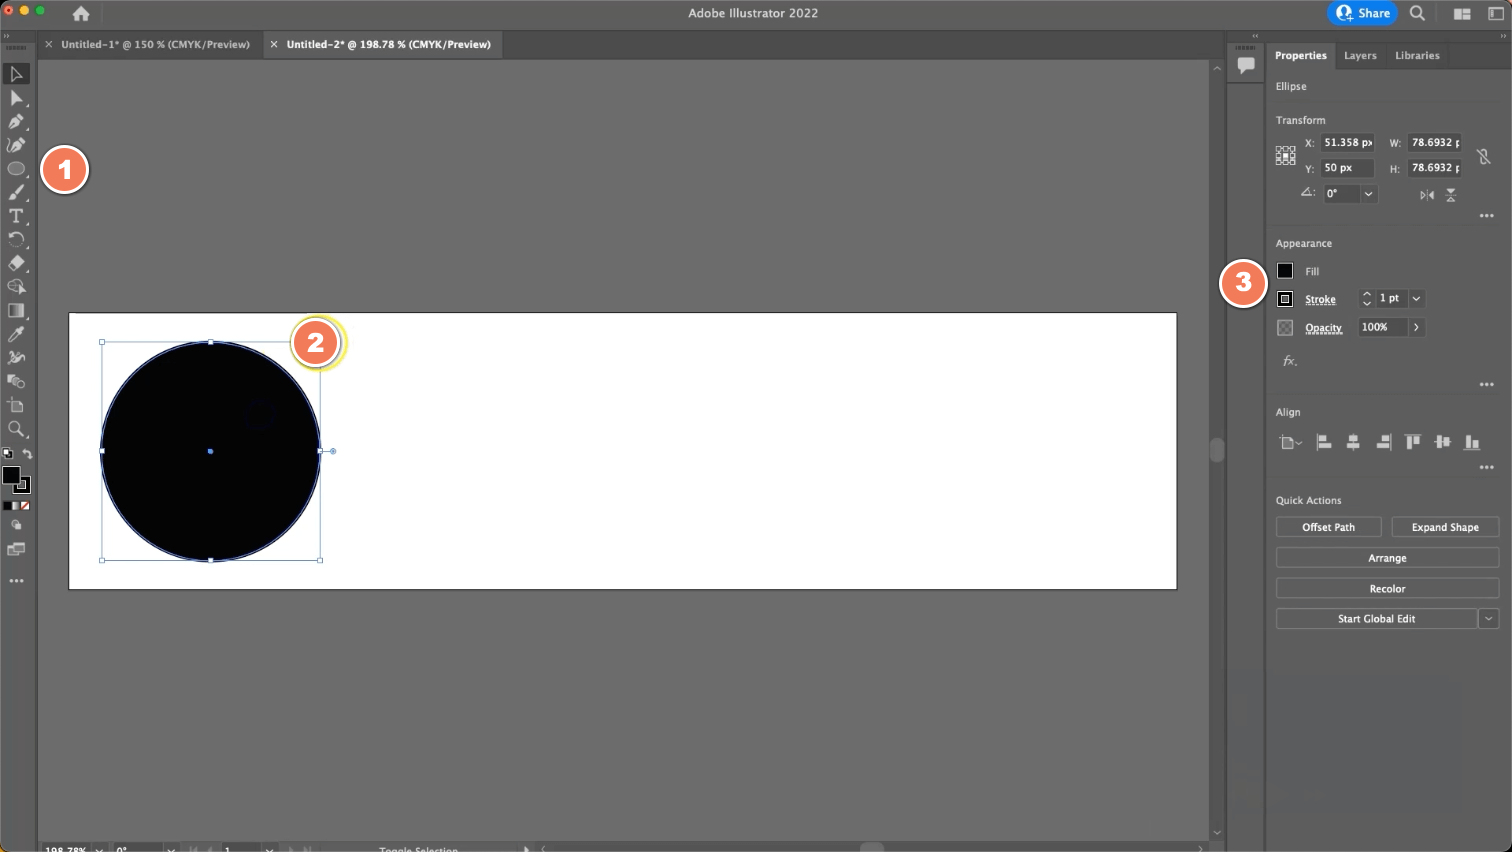
Create circle shape
Select the Circle Shape tool (1) in the left bar
Hold the Shift-key and drag a uniform circle shape (2) on the art board
Make sure the Fill and Stroke colors (3) are the colors you want, we are using black
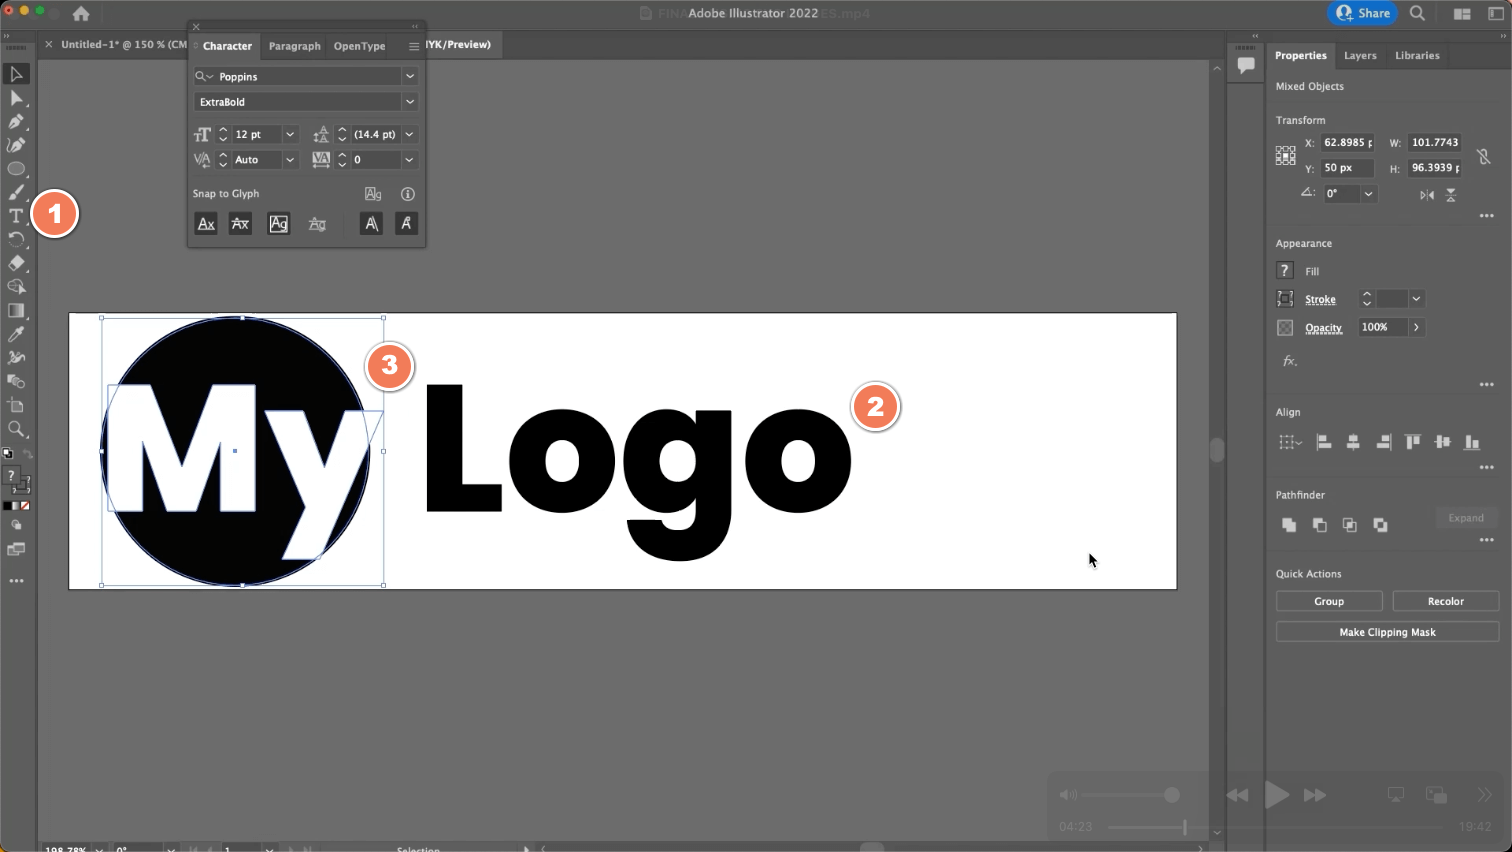
Add logo text
Select the Text tool (1) in the left bar
Type your logo text (2) then hold the Shift-key and scale the text uniformly so that the first two letters go outside the bounds of the circle
Select the first two letters (3) you typed and change the color to white
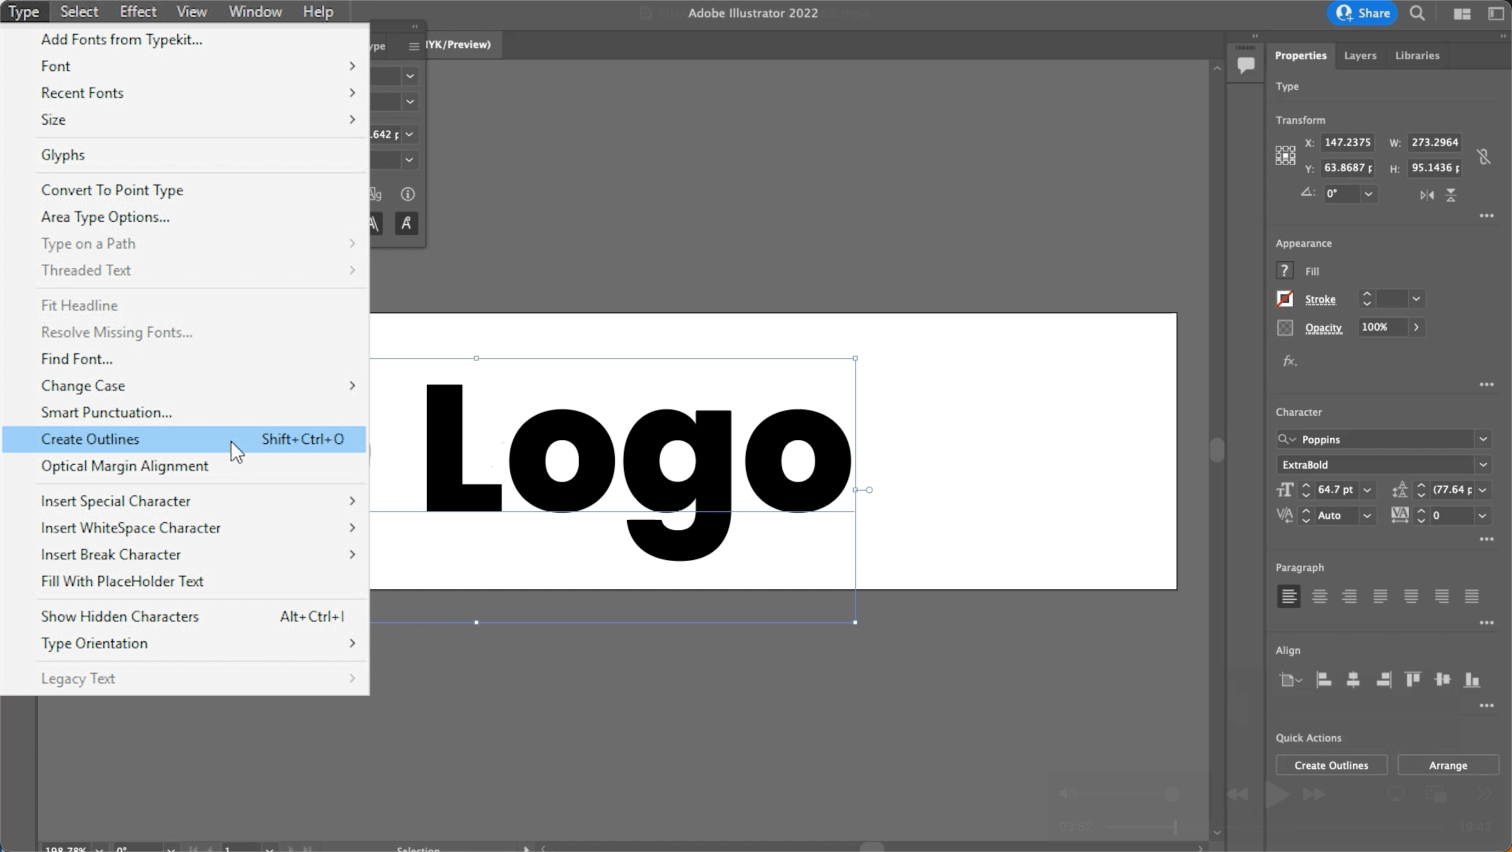
Convert the logo text into paths
Select the text
Go to Type > Create Outlines
Now right-click the text and click on Ungroup
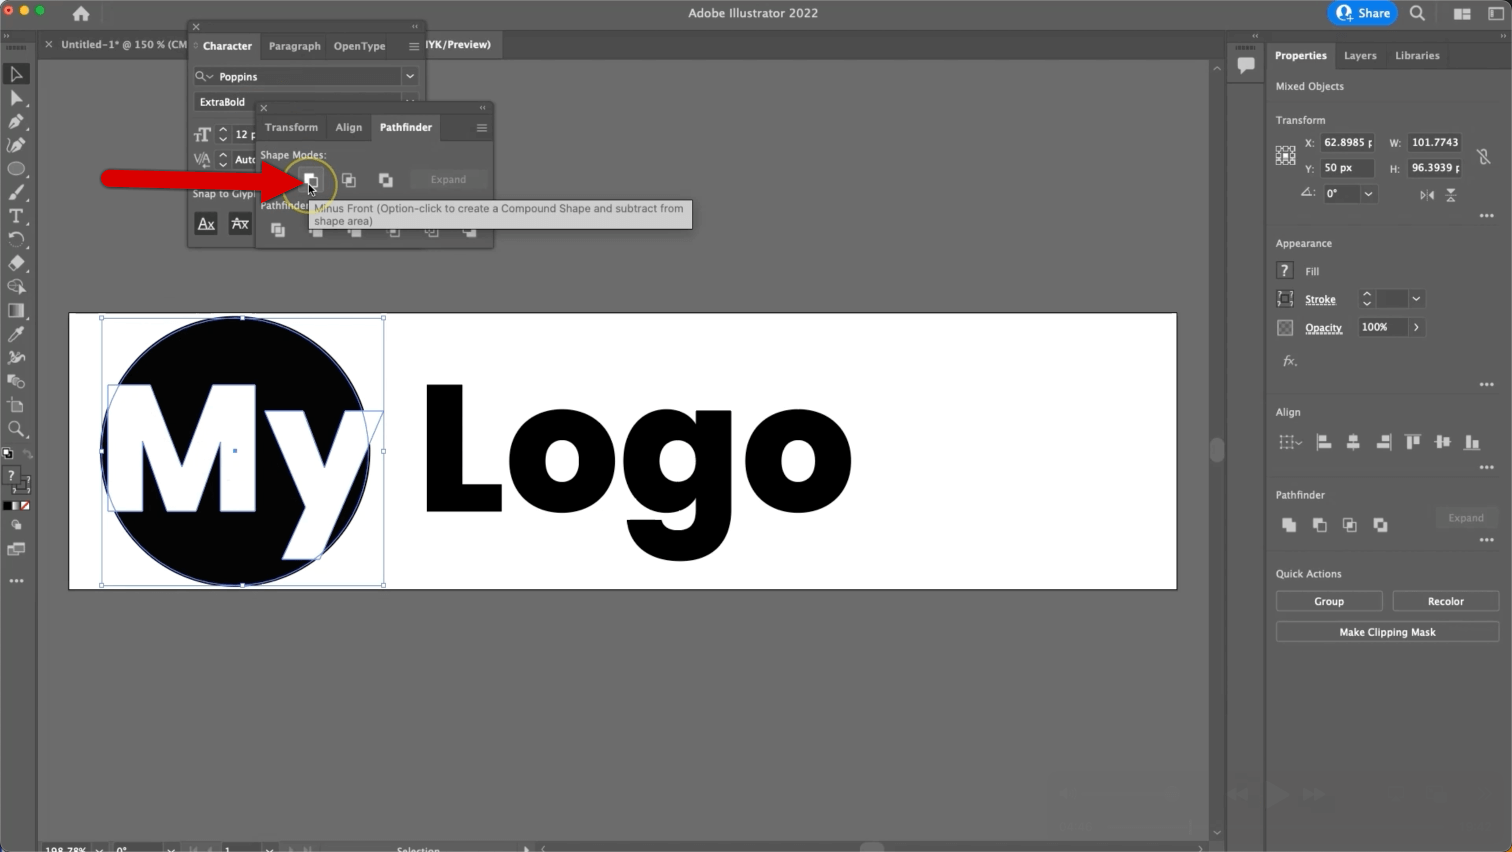
Combine the text and circle
Select the circle and the two-letter inside of it
Make sure the Pathfinder window is open Window > Pathfinder > Minus Front
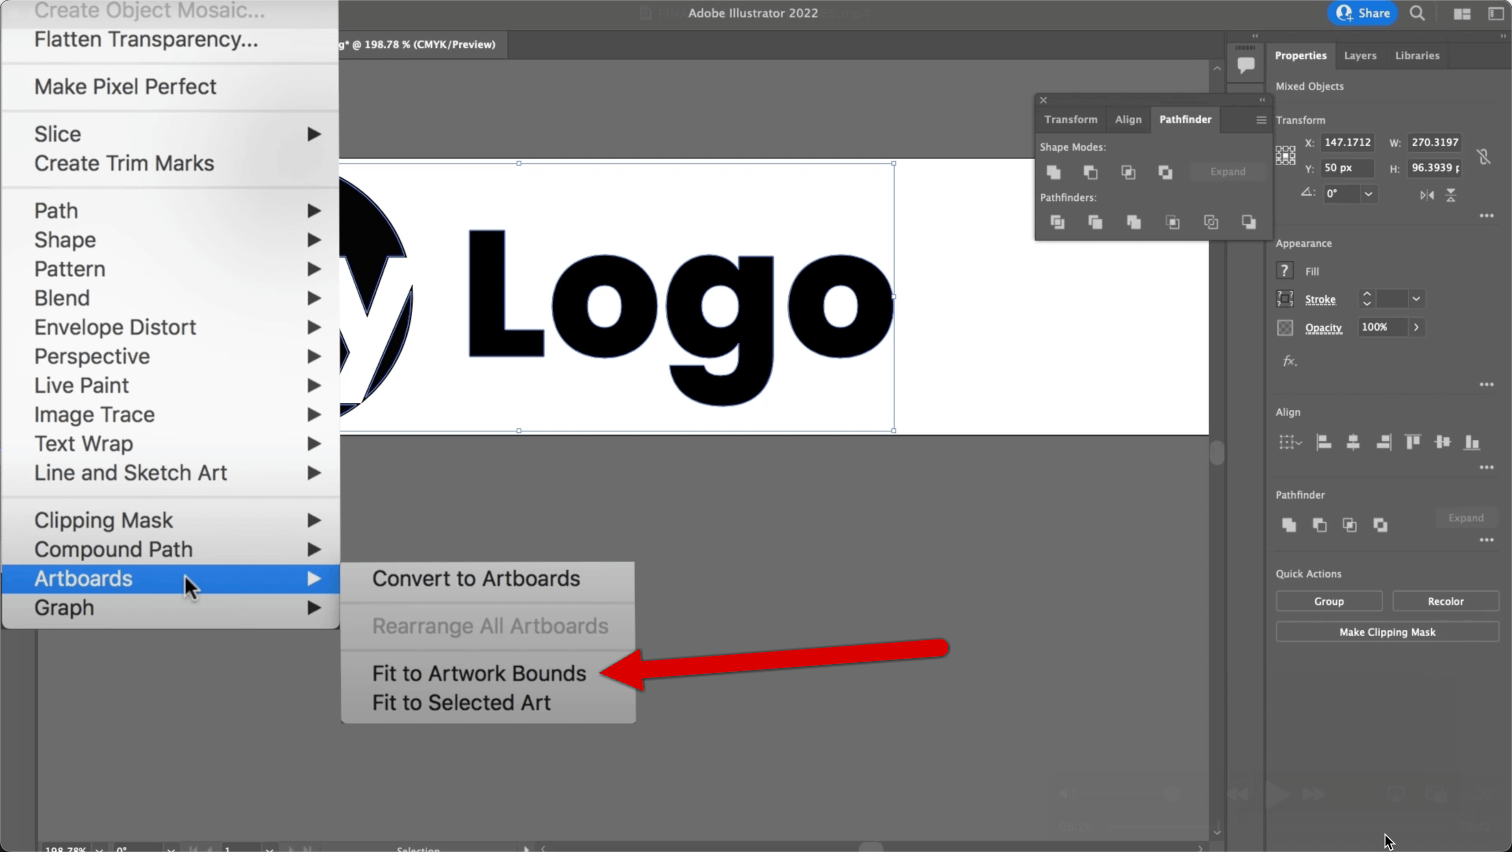
Make the artboard the same size as the logo
Select all the art on the artboard
Go to Object > Artboards > Fit to Artwork Bounds
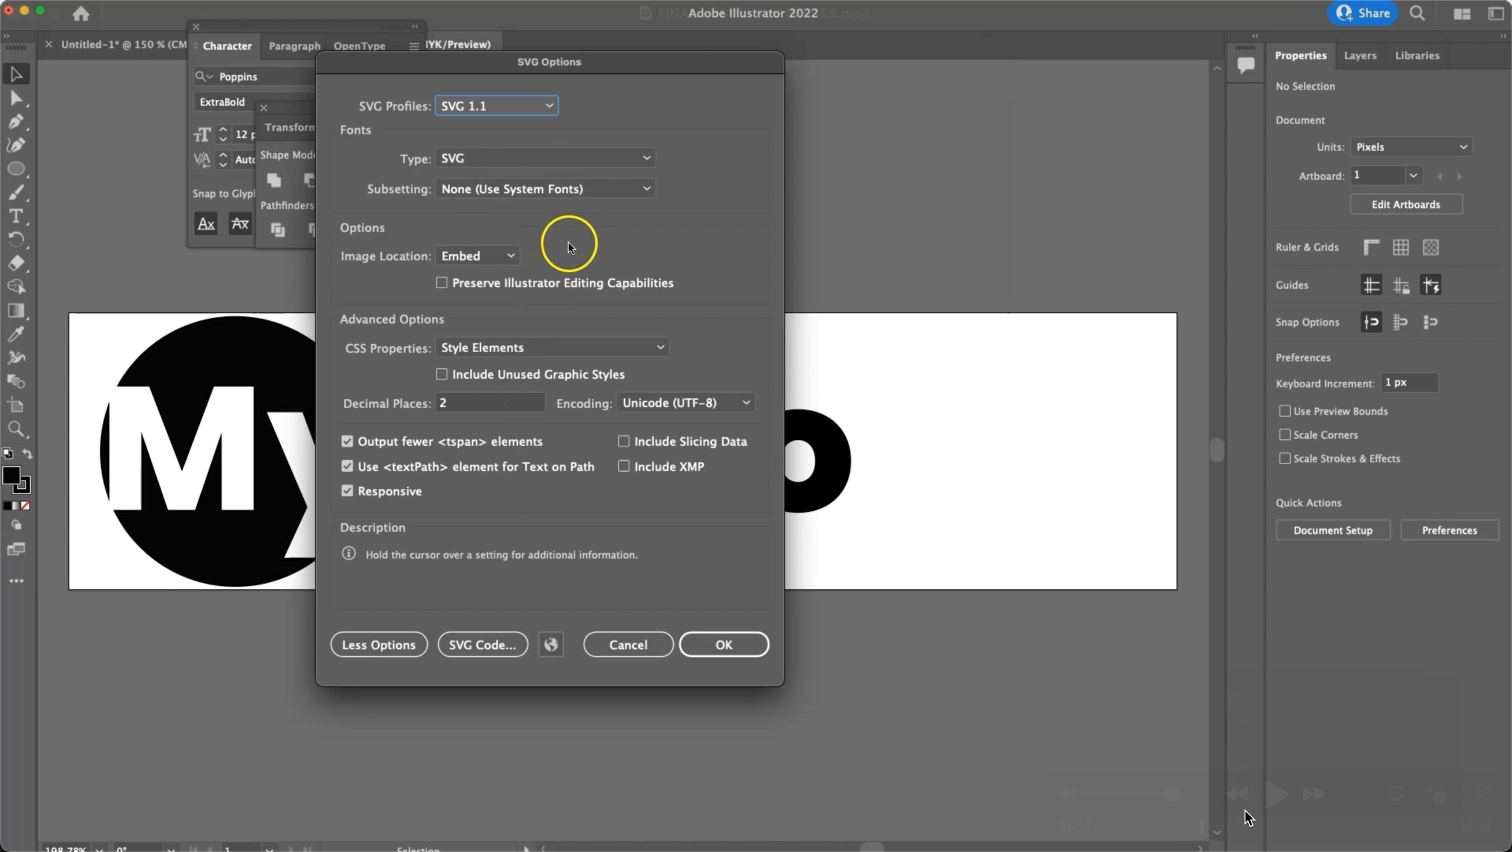
Saving your SVG file
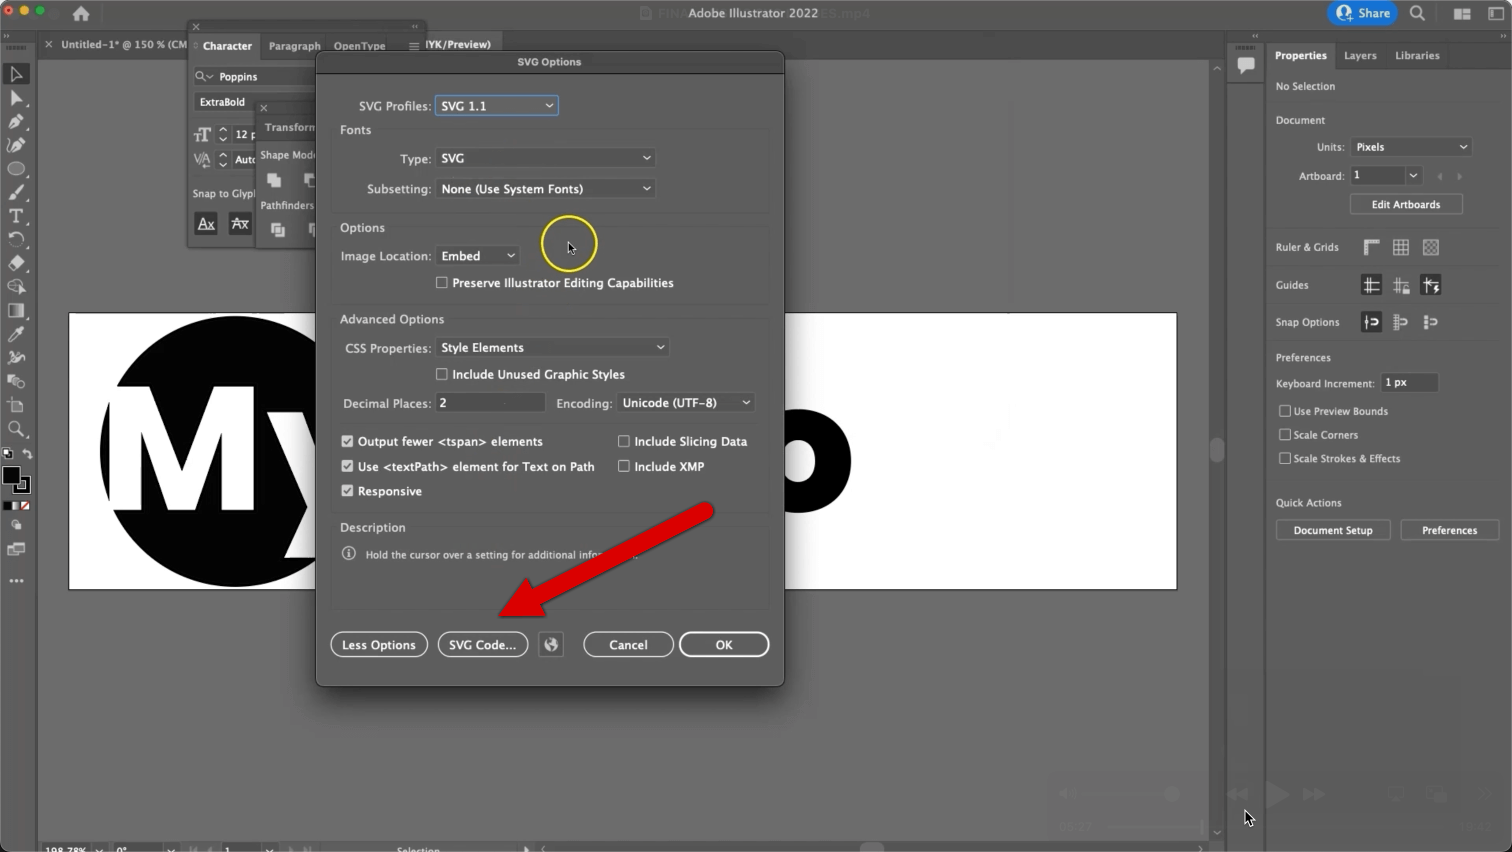
Make sure to Save As with the settings below
Yewwwww, here we go. We have our SVG saved and we are ready to party folks!
Here in the next step, we will get to show you two different ways to implement SVG images in Divi. One will require us to install a plugin, and the other will work with the actual SVG code.
Now go you, brush that shoulder off.
Method 1: Adding SVG Support to Divi
So as I’ve mentioned, Divi and WordPress do not come out of the box with SVG support, so we need to either add the MIME type or use a plugin to allow SVG file support. Aptly named, today we will use a plugin called SVG Support to add this functionality to our Divi install. If you’d like to know how to manually add SVG upload support, check out our tutorial on How to FIX “Sorry this file type is not permitted for security reasons.” where we show you exactly how to enable SVG in Divi.
Installing SVG Support
Let’s start by logging into the backend of our Divi site and installing the plugin.
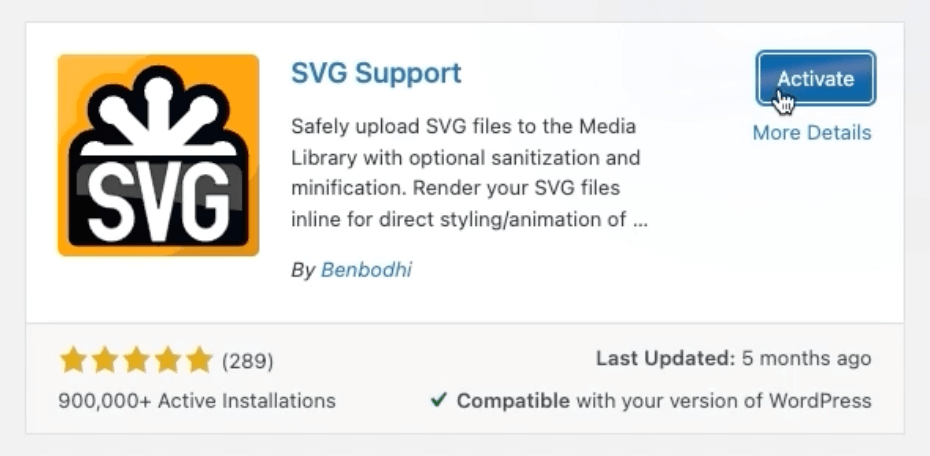
Go to Plugins > Add New > And search for SVG Support
Install and then Activate the plugin.
Awesomeness! With SVG support added to our Divi site, we can now use our SVG image as our Divi site logo.
Assign your SVG logo to Divi
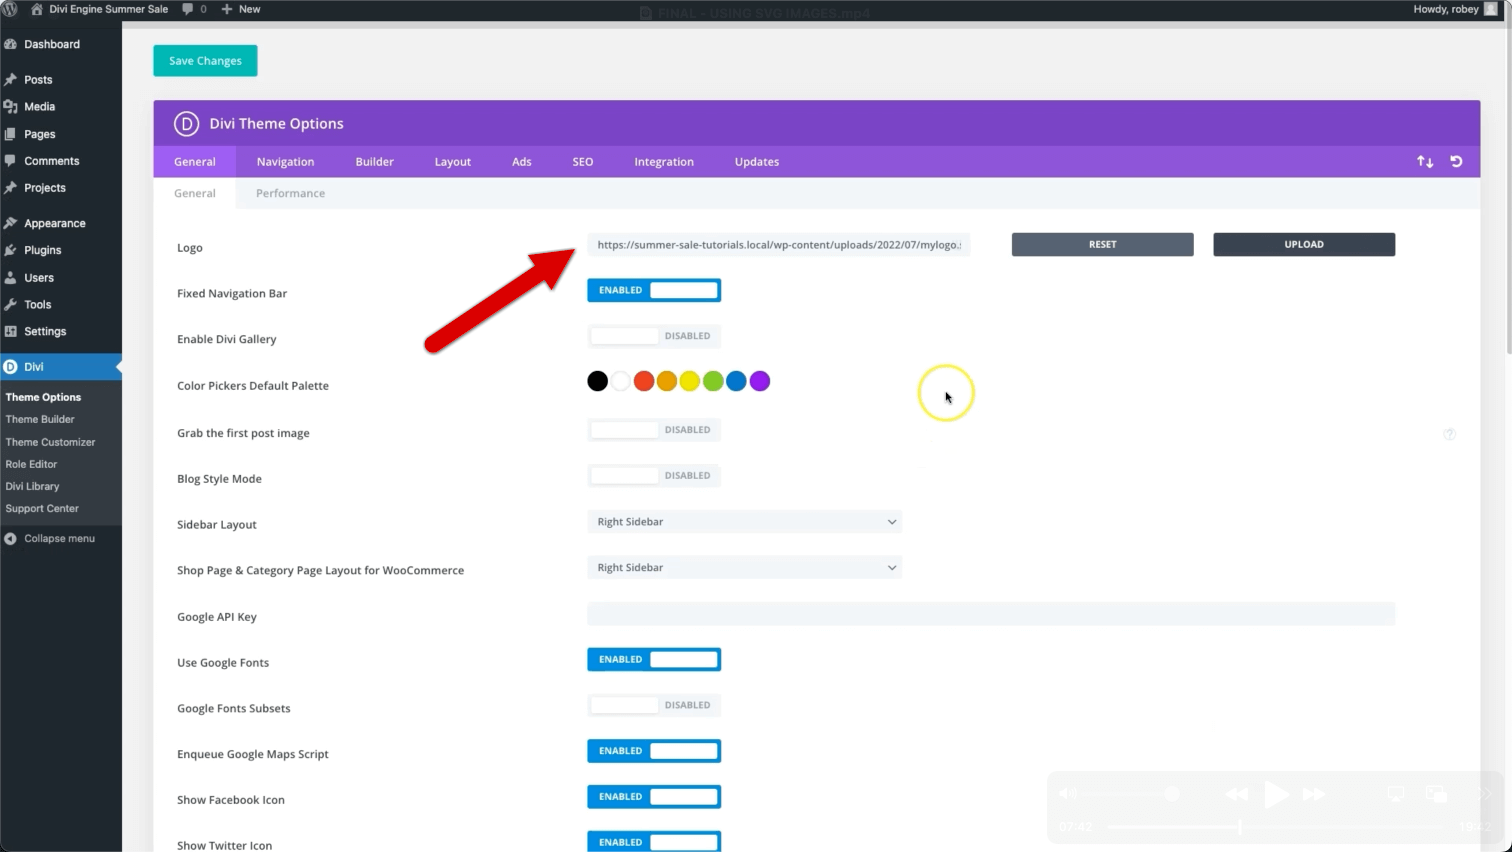
Go to Divi > Theme Options
Upload and assign your logo.
This is all good and well, but what if you wanted to use SVG images in other contexts or maybe even modify them on the fly like the ninja you are? With SVG images essentially just being XML code that tells the browser where to wield its paint brush, you can actually modify that code with CSS.
Let’s take a look at how we would obtain and modify that code to take things a step further.
Method 2: Adding SVG code to Divi
For you purists out there, adding the SVG for your images is by far the most versatile use of SVG images in Divi. Not only does this avoid you having to use a plugin to use your SVG image sin Divi, but it also offers another level of customizability to achieve some really awesome effects.
First things first, let’s grab the code for our SVG images in Illustrator and then add it to our Divi site.
Export your SVG code from Illustrator
We will follow the same steps as we did above to save our SVG file, but before we hit that final save button, we will click on SVG code...
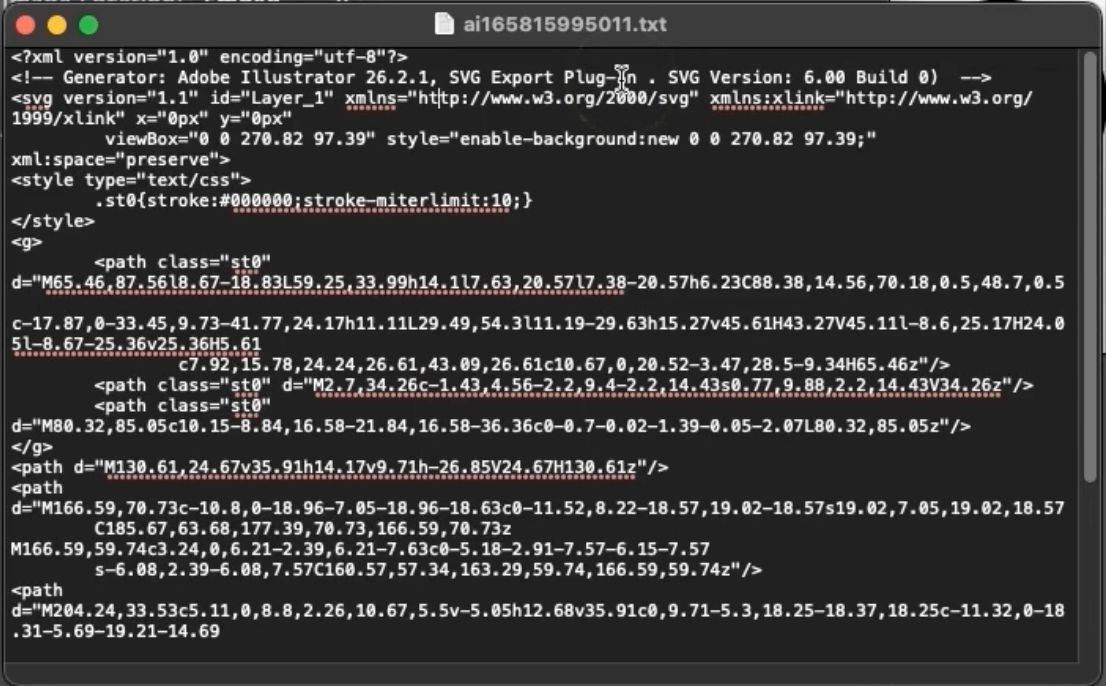
This will pop open a window filled with code, just copy the whole lot to your clipboard and head back to your Divi install.
Adding your SVG code to Divi
Edit or create a new page or post in Divi then add a code module
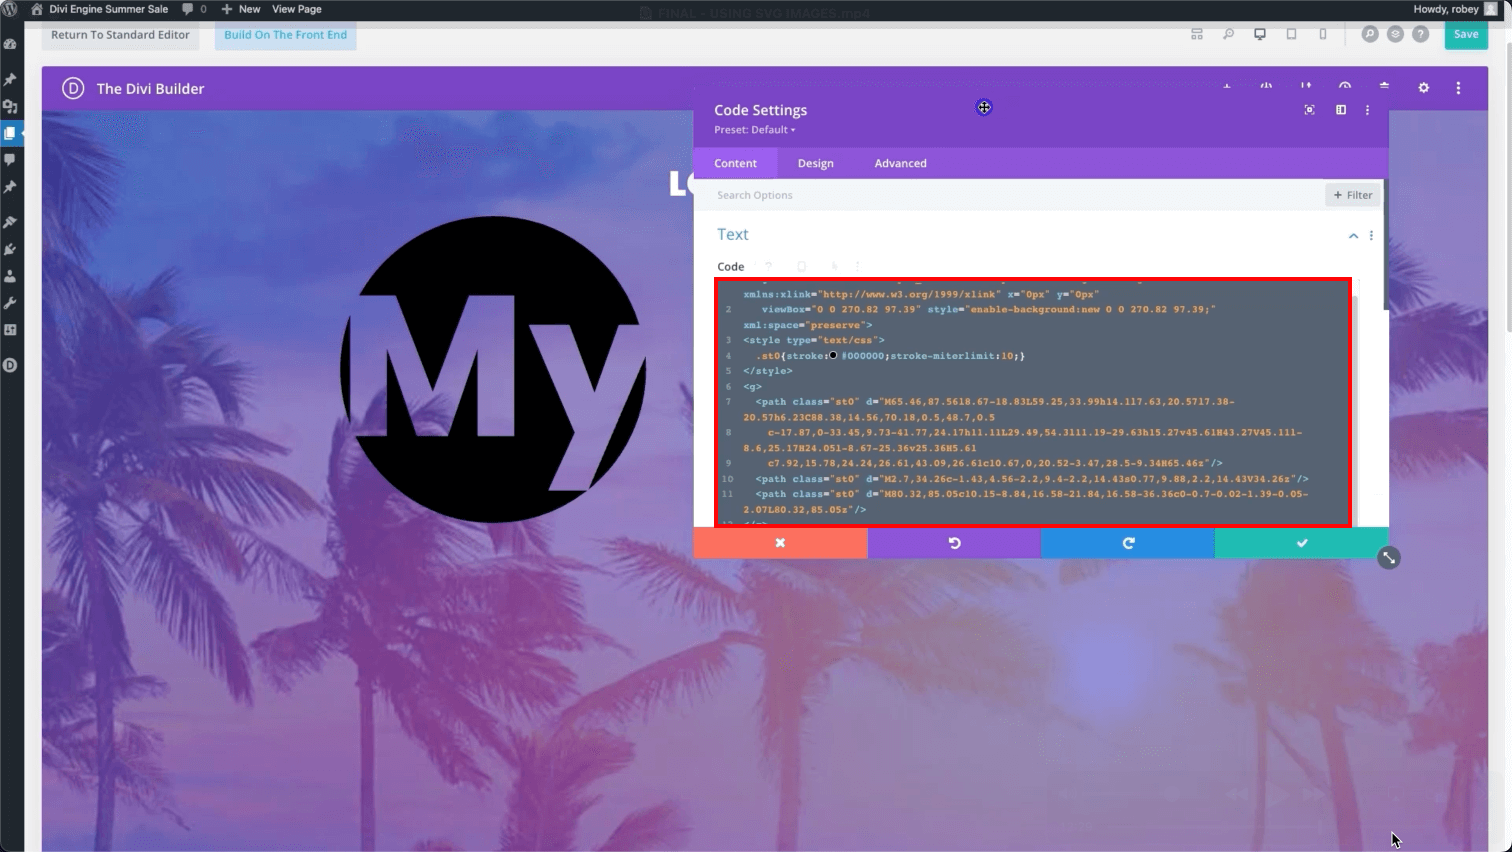
With that open, paste the code that you copied to your clipboard from Illustrator into the code area
And there you have it! You might not know why it works or exactly what you did, but you just added an SVG image to your Divi site by pasting a bunch of words and numbers into a code module you magician you.
As fancy as this is, we will take things a bit further in the next section where we will show you how to customize this SVG code with CSS to add some pretty cool effects.
Changing SVG elements with CSS
As if using SVG images in Divi didn’t already have a ton of benefits, we get rewarded even further with the ability to tweak our SVG image by applying some CSS code.
Now think about that for a second you genius.
Yeah, if you can apply CSS to your SVG images, you can start doing some pretty incredible things. Think about changing the style, colors, size, and more. Then think some more and realize you can add hover effects and animations.
This is powerful stuff right here and we will dive into all of it soon, but for today, let’s look and how we set ourselves up to do all this.
Assign CSS classes to your SVG code
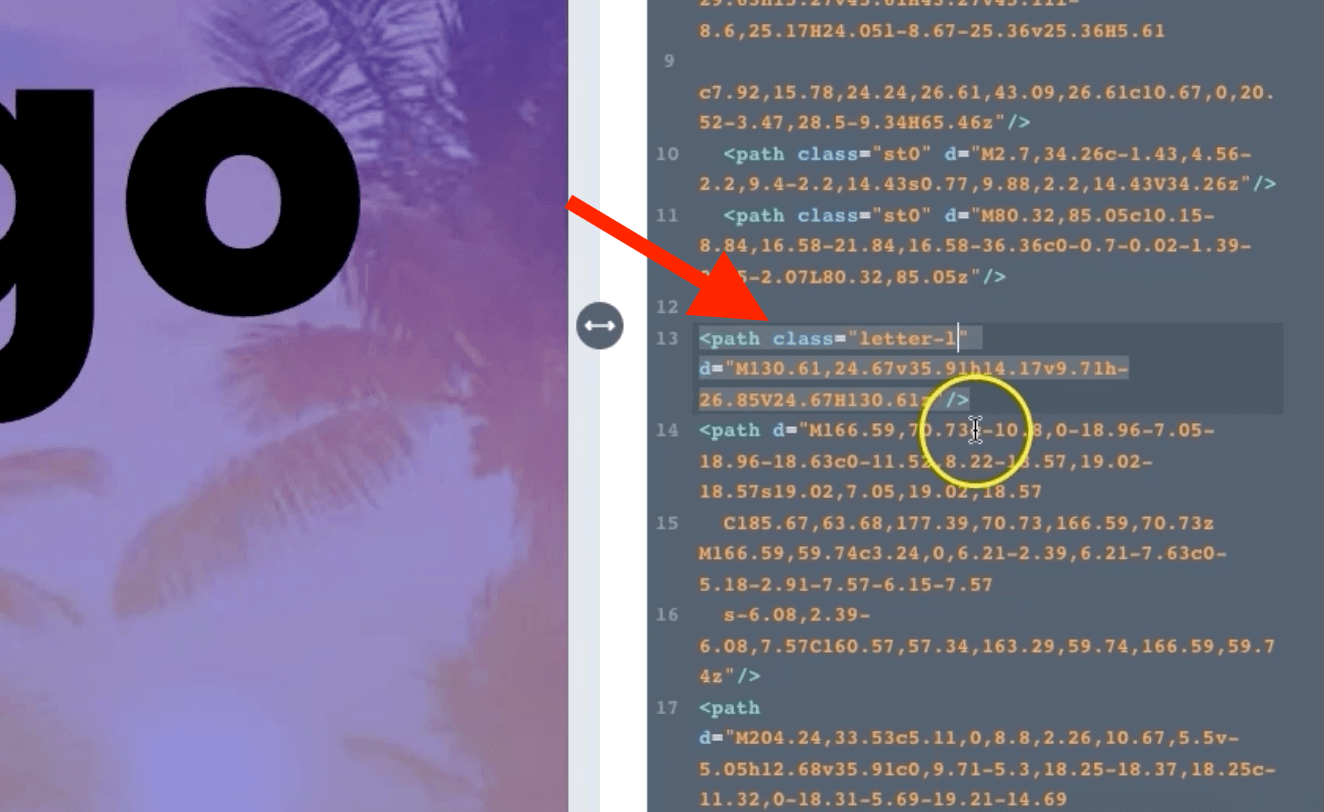
Inside of your SVG code you will a bunch of path declarations. These are the actual shapes that make up your SVG image, how cool is that? Now if you want to know what path corresponds with what element of your SVG image, just delete one character of the path declaration and you will see if disappear off the screen.
This is a rather primal way of doing things, but this way we know what goes with what and we can actually add CSS classes to each path so that we can manipulate it with CSS code.
Add a class to a path
Once you’ve found a path that you want to manipulate, just add a regular class declaration which might look something like this:class="letter-l"
The rest should come pretty naturally, all we need to do is add another code module and then start manipulating our class with some CSS. Don’t forget, that you can add classes to each of the paths in your SVG code, so the possibilities are endless.
Right now, we will look at manipulating the letter-l class we just added.
Add CSS code to change our SVG image
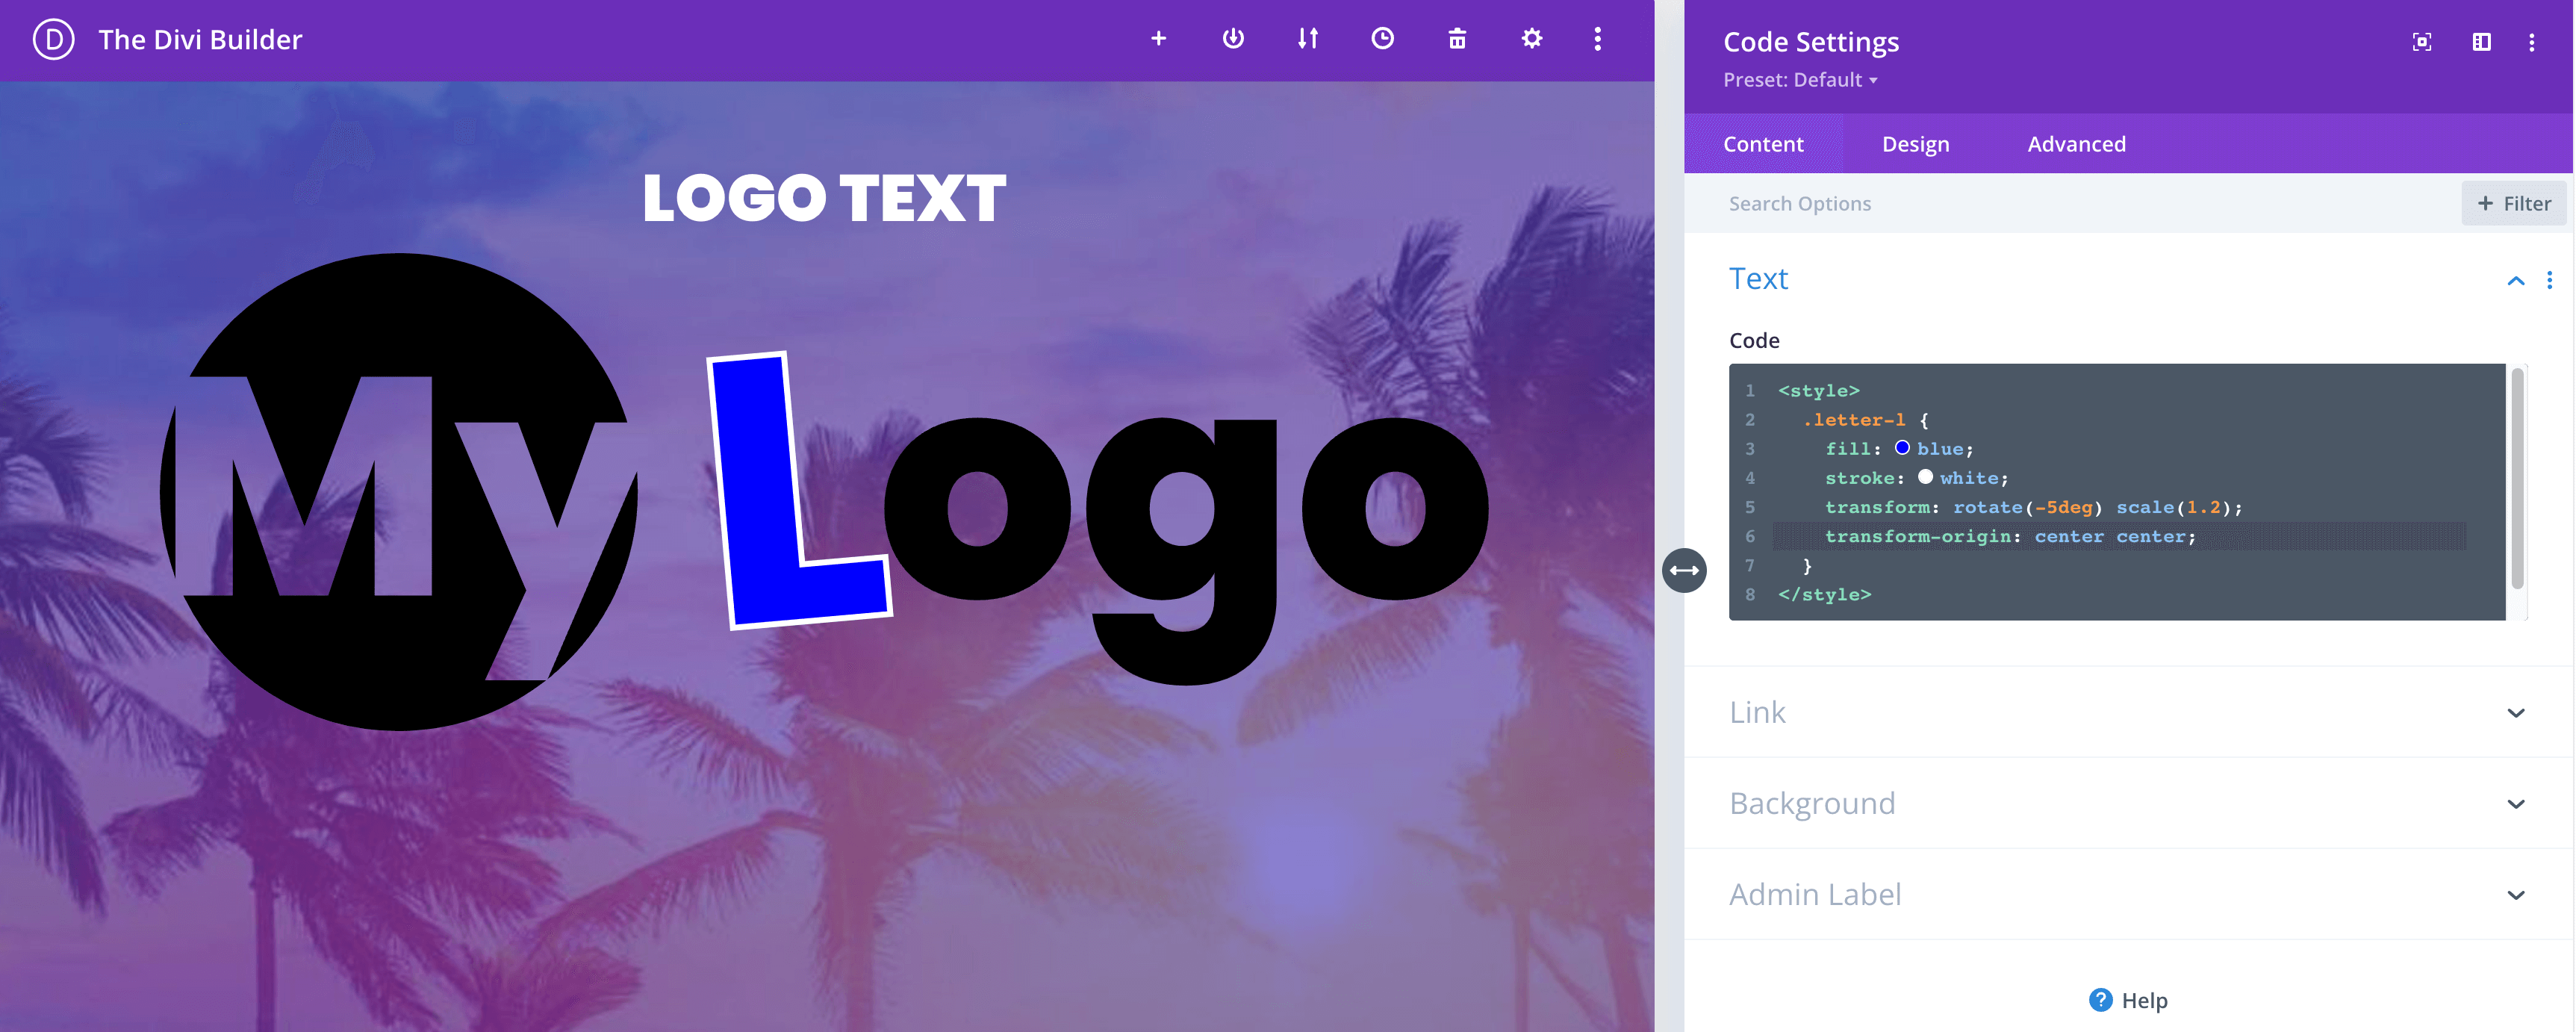
For this we will just write some standard CSS to manipulate the look of our SVG logo. You can use pretty much any CSS here, but for this we will look at the fill, stroke, and transform CSS properties.
Add another code module and paste the code below between two <style> tags and see your logo change.
  .letter-l {

    fill: blue;

    stroke: white;

    transform: rotate(-5deg) scale(1.2);

    transform-origin: center center;

  }
Dang Daniel! How awesome does that look? And how cool is it that we are able to modify an SVG logo we create in Adobe Illustrator with code in Divi? I’m really impressed and you should be proud folks!
SVG…ENHANCE!
Conclusion
SVGs basically give you Divi dev super powers, so we hope that this little tutorial on How to create and use SVG images in Divi was helpful. We won’t be stopping here though, we will be taking a look at how we animate SVG images in Divi, so definitely stay tuned for that in a future tutorial.
Definitely drop a comment below to let us know what you think, and for sure share any suggestions.
Did we mention Divi Mobile now supports custom SVG images?
You can use all the skills you learned in this tutorial to start crafting your very own hamburger icons in Divi Mobile.
Divi Mobile is an amazing tool that you can use to create a truly unique menu and header layout for both desktop and mobile Divi sites.

written by
Robey Joyce
Business Development Manager
You probably have heard his voice in our tutorial and documentation videos – but he does quite a bit more here at Divi Engine. Robey also works to help bring our products to awesome folks just like yourself.











I just started working with vectors. And it will be very interesting to apply the proposed methods in practice. Since I am interested in it, I found more https://masterbundles.com/stock-content/vector/jesus-svg/ with a large collection of vector images. There are both paid and free offerings, which is doubly attractive.